Android11 permissions description
How to get access to background location information
When an app requests access to background location information, the “Always Allow” option will no longer be available in the pop-up window that allows the user to grant permissions, which only exists on the app permission grant page in the settings, and the application for background location permissions requires the app to already have the foreground location permissions.
Adaptation Recommendations: If your app determines that it needs permission to access background locations, you now need to take a two-step process because it is no longer possible to request access to background locations directly without access to your foreground location.
Apply for access to the front desk location information first;
Then apply for access to the background location information and guide the user to the settings to grant it.
Block permissions
Android 11 introduces a new feature: if a user denies permissions twice, it will prevent apps from requesting permissions. After two denials of application permissions, users must manually grant permissions to the application if they want the application to function correctly.
Revoke unused application permissions
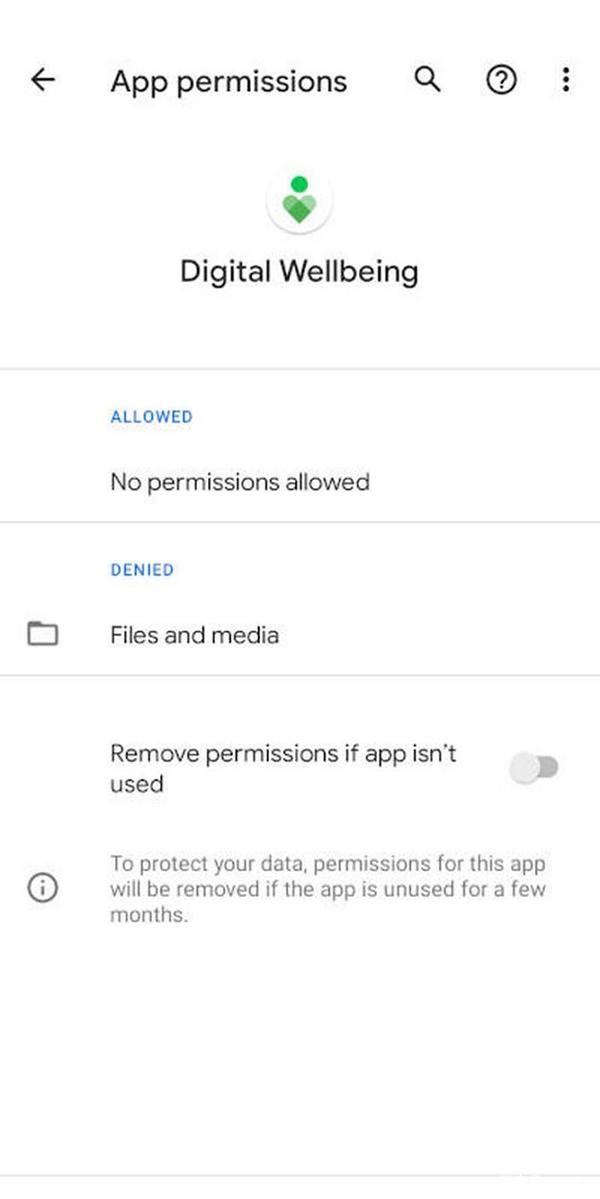
This is the last change to the permissions system. If you have an app that has been granted permissions but haven’t used the app for months, the permissions will be revoked and you can only manually re-enable it. This feature is available for each application (as shown below) and is not enabled by default, so you need to do it manually and enable it.
If you want auto-authorization without popping up the USB Permission dialog, iMin provides the following two solutions to solve what you want.
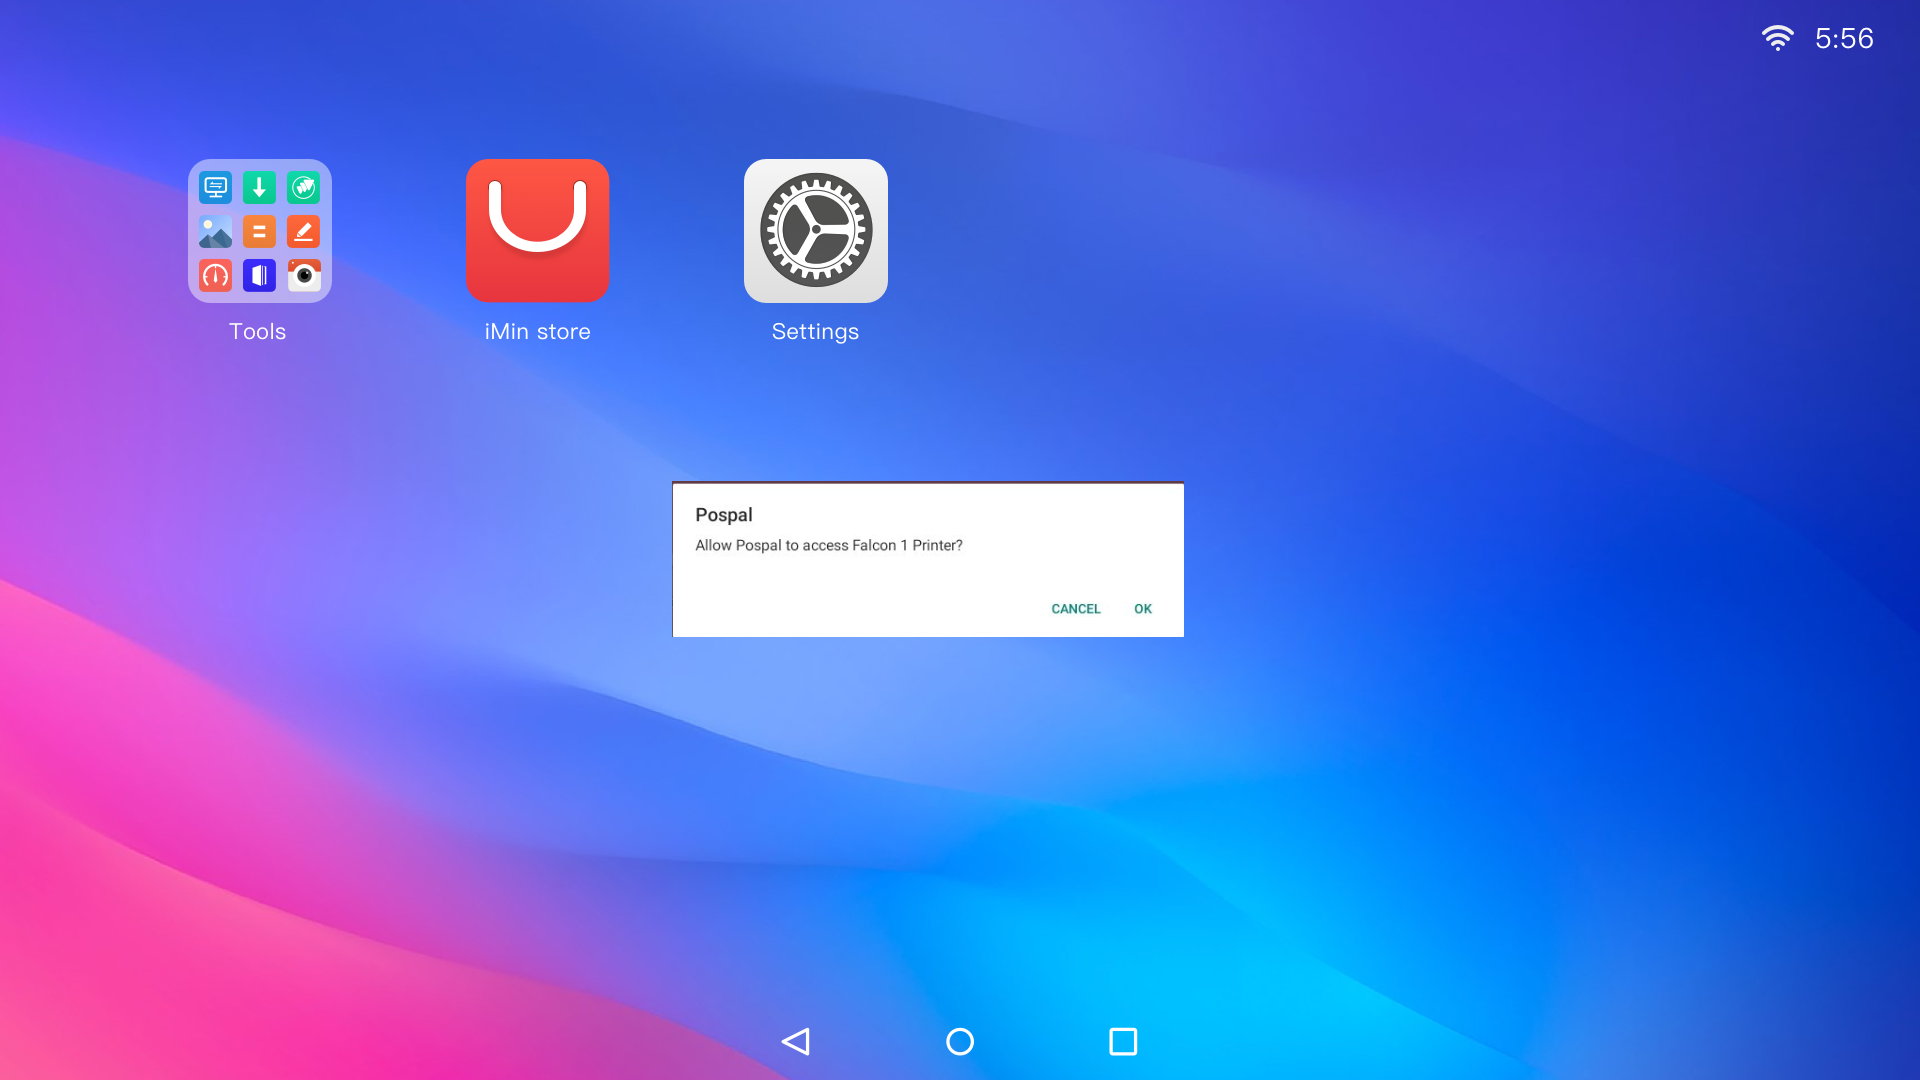
Solution option 1:
Functional supports on iMinKit platform. Partners can dynamically configure iMinKit to allow the specified application to use any USB peripheral as the default device, without requiring the user to confirm with a pop-up window (this solution does not require the customer’s software to modify the code, only rely on the networking to the device)
Dateline: Released on 8/25 (D4 RK3288 Android 11), other models will be upgraded accordingly
Solution option 2:
Android app USB permission application prompt window whitelist (that is, to control pop up interface of the permission dialog) Mainly divided into 3 interfaces: add application whitelist, delete application whitelist, clear whitelist
Note
Compatible with iMin Android 11 devices built-in printer series model (D1w,D2,D3,D4,M2 Max, D1, D1 Pro,S1,K1,K2) with the latest iMin OS version update (check your update in “Wireless Update” option)
Development environment
Suitable for Eclipse/Android Studio/tools that support Android application development
Instructions
Import the package that sets the system database: import android.provider.Settings;
Use the android standard method of setting the database (key/value)
1. Add the whitelist interface of the App
Function:void putString()
Remarks:
1Settings.System.putString(getContentResolver() , "imin_system_add" , "com.xxx.xx");
parameter:
imin_system_add –> add the key to add the App whitelist
com.xxx.xx –> represents the package name of the whitelisted App (the full App package name)
2. Delete the whitelist interface of the App
Function:void putString()
Remarks:
1Settings.System.putString(getContentResolver() , "imin_system_remove" , "com.xxx.xx");
parameter:
imin_system_remove –> represents the key to remove the App whitelist
com.xxx.xx –> represents the package name of the whitelisted App (the full App package name)
3. Clear whitelist interface
Function:void putString()
Remarks:
1Settings.System.putString(getContentResolver() , "imin_system_clear" , "clear");
parameter:
imin_system_clear –> indicates the key to clear the whitelist
clear –> means to clear all package names of whitelisted applications